RGB Catear Build Instructions

This guide aims to explain in simple terms how to assemble the c3cat catear build kit.
To follow it, you need soldering equipment, a heatgun, a pair of striping pliers as well as one of our build kits.
If you did not get a hold of one of those kits, take a look at our BOM.
The general project assembly looks like this where each of the components must be connected via soldering points.
┌─────┐                          ╭───╮
│ ESP ├┄┄╼ ╾┄┄┄┄┄┄┄┄┄┄┄┄┄┄┄┄┄┄┄┄┄│   │
└─────┘
         ╱ ╲         ╱ ╲          ╱ ╲
     pluggable      long         catear
     connector      cable        & leds
Inside this guide, you will find the following content
Flash the microcontroller
We recommend to use WLED as a firmware on all our catears. It offers a wide range of features for display and animation and can be controlled comfortably from your smartphone.
Solder cables to LED strip
One of the most important steps is to electircally connect the microcontroller to the LED strip. We will start with the LED side.
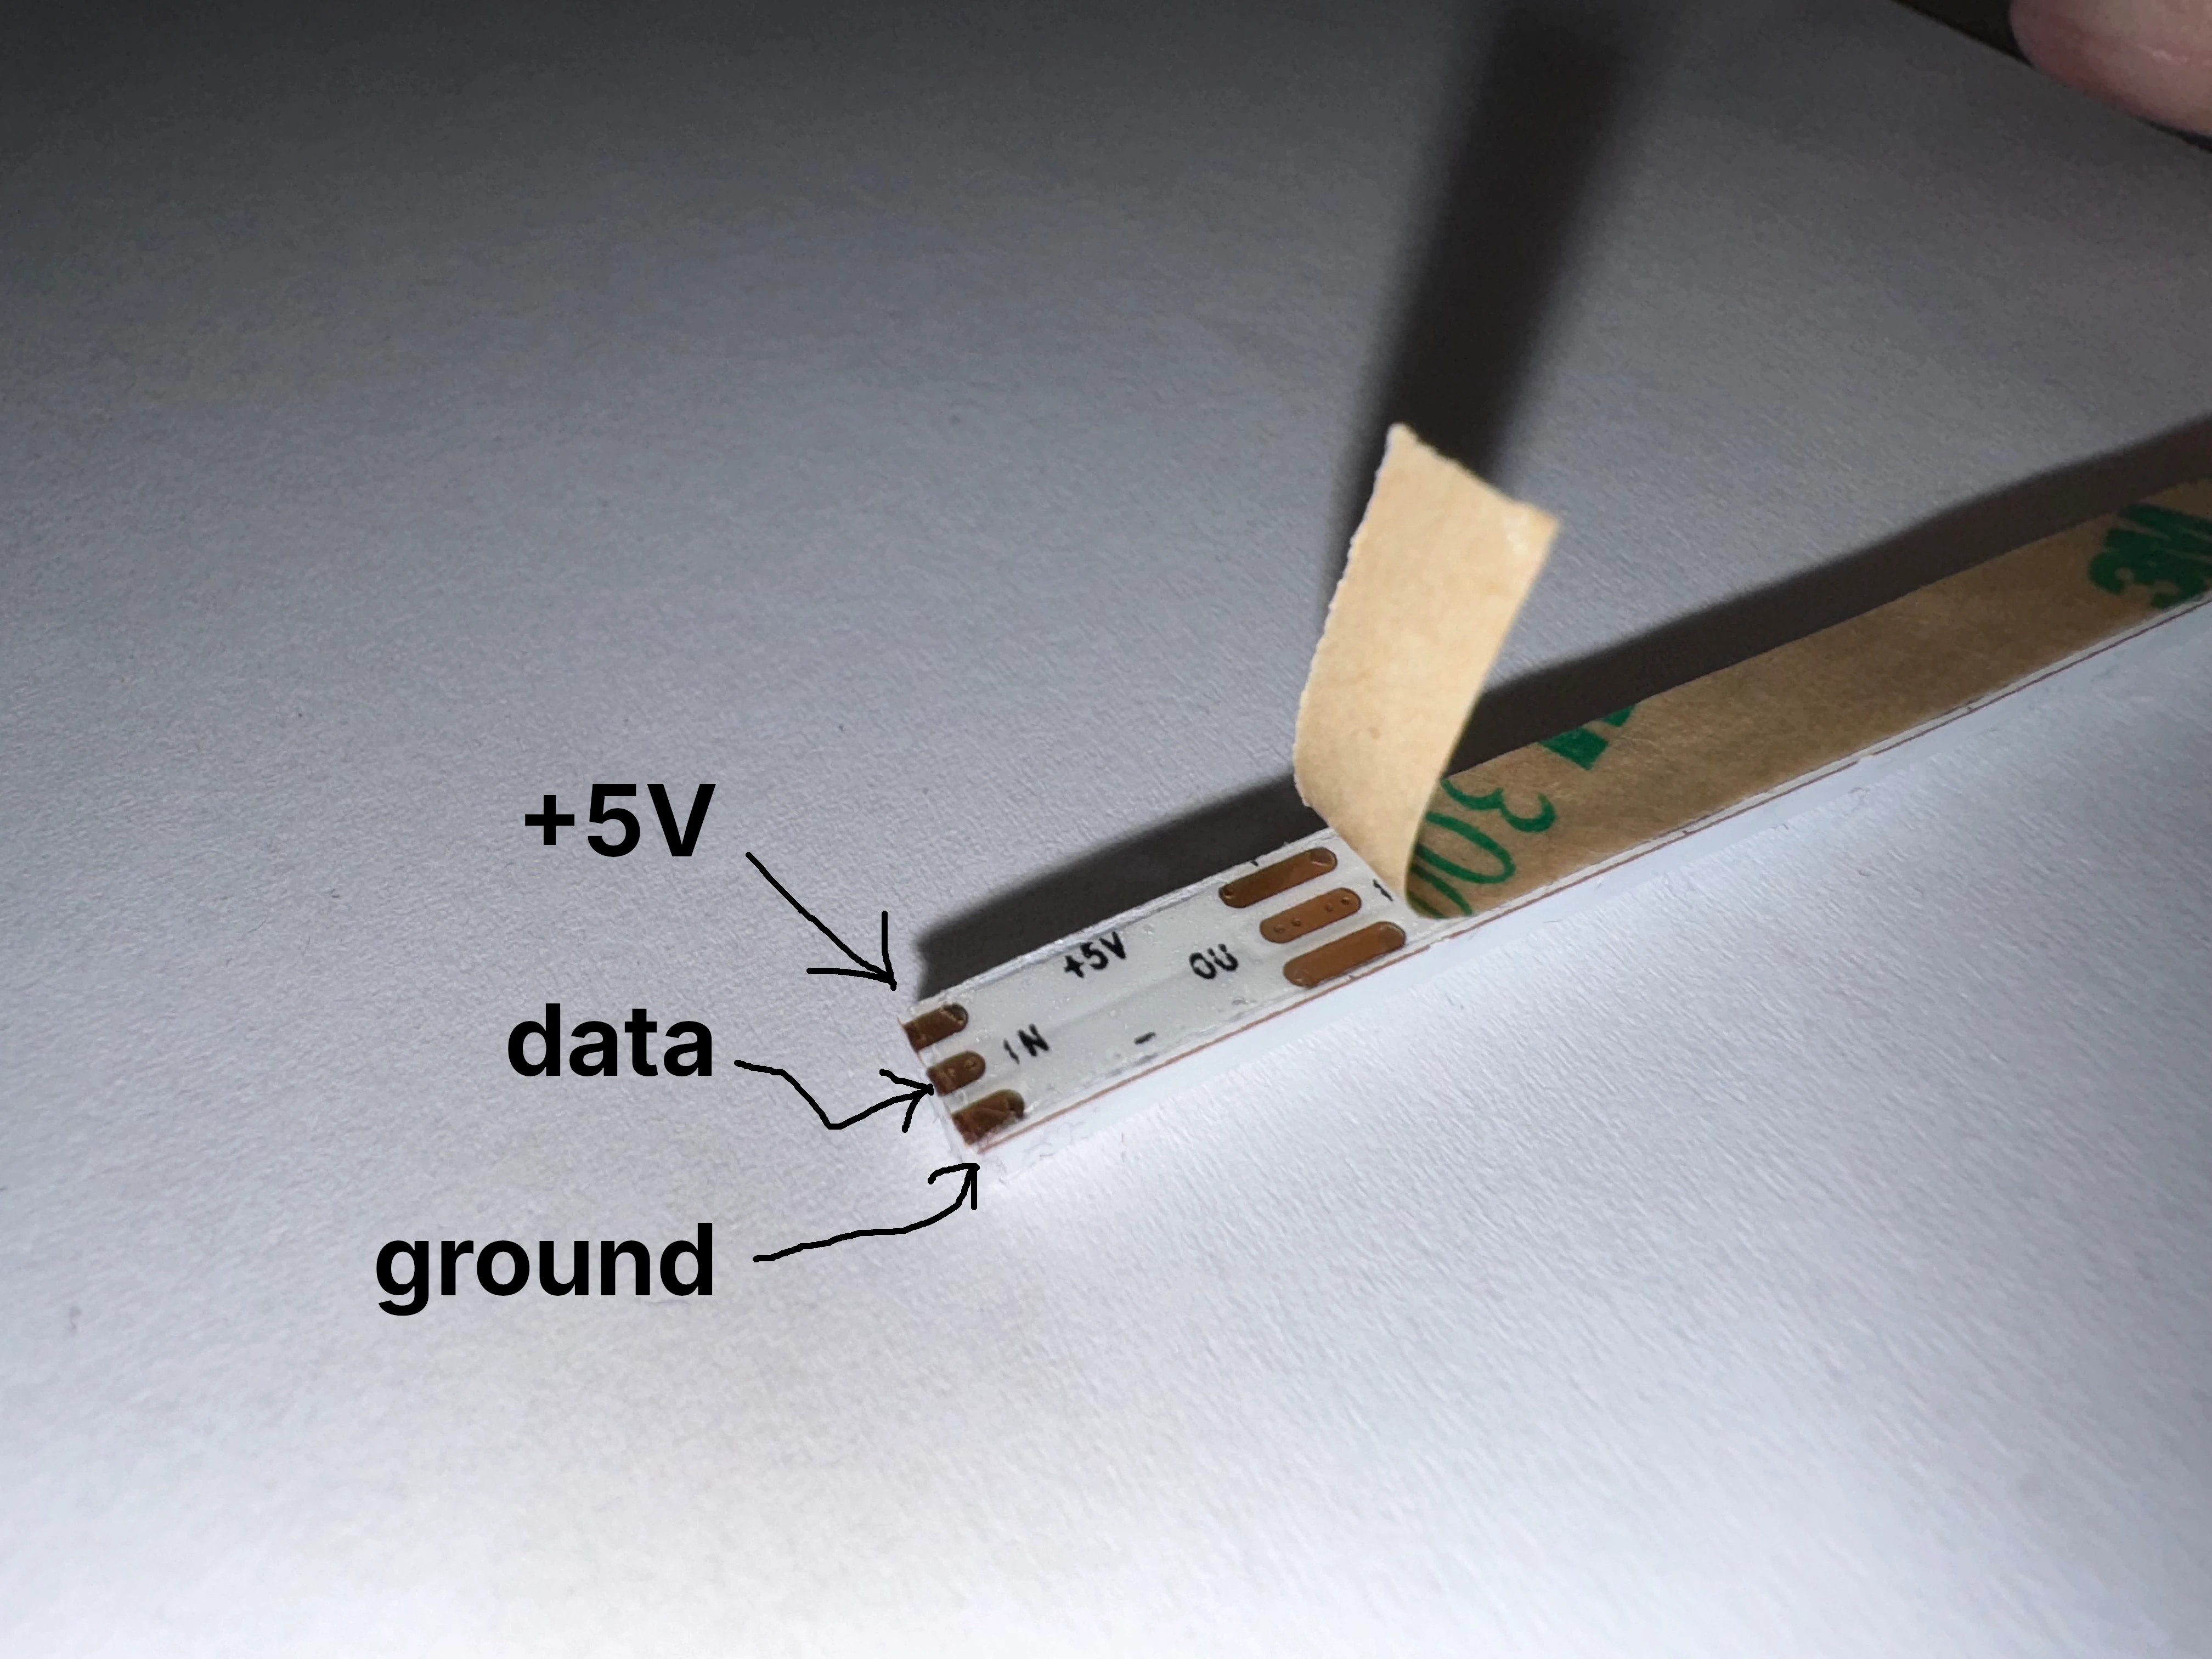
Solder Cable to pluggable connector
The other side of the long cable now needs to be connected to the pluggable connector.
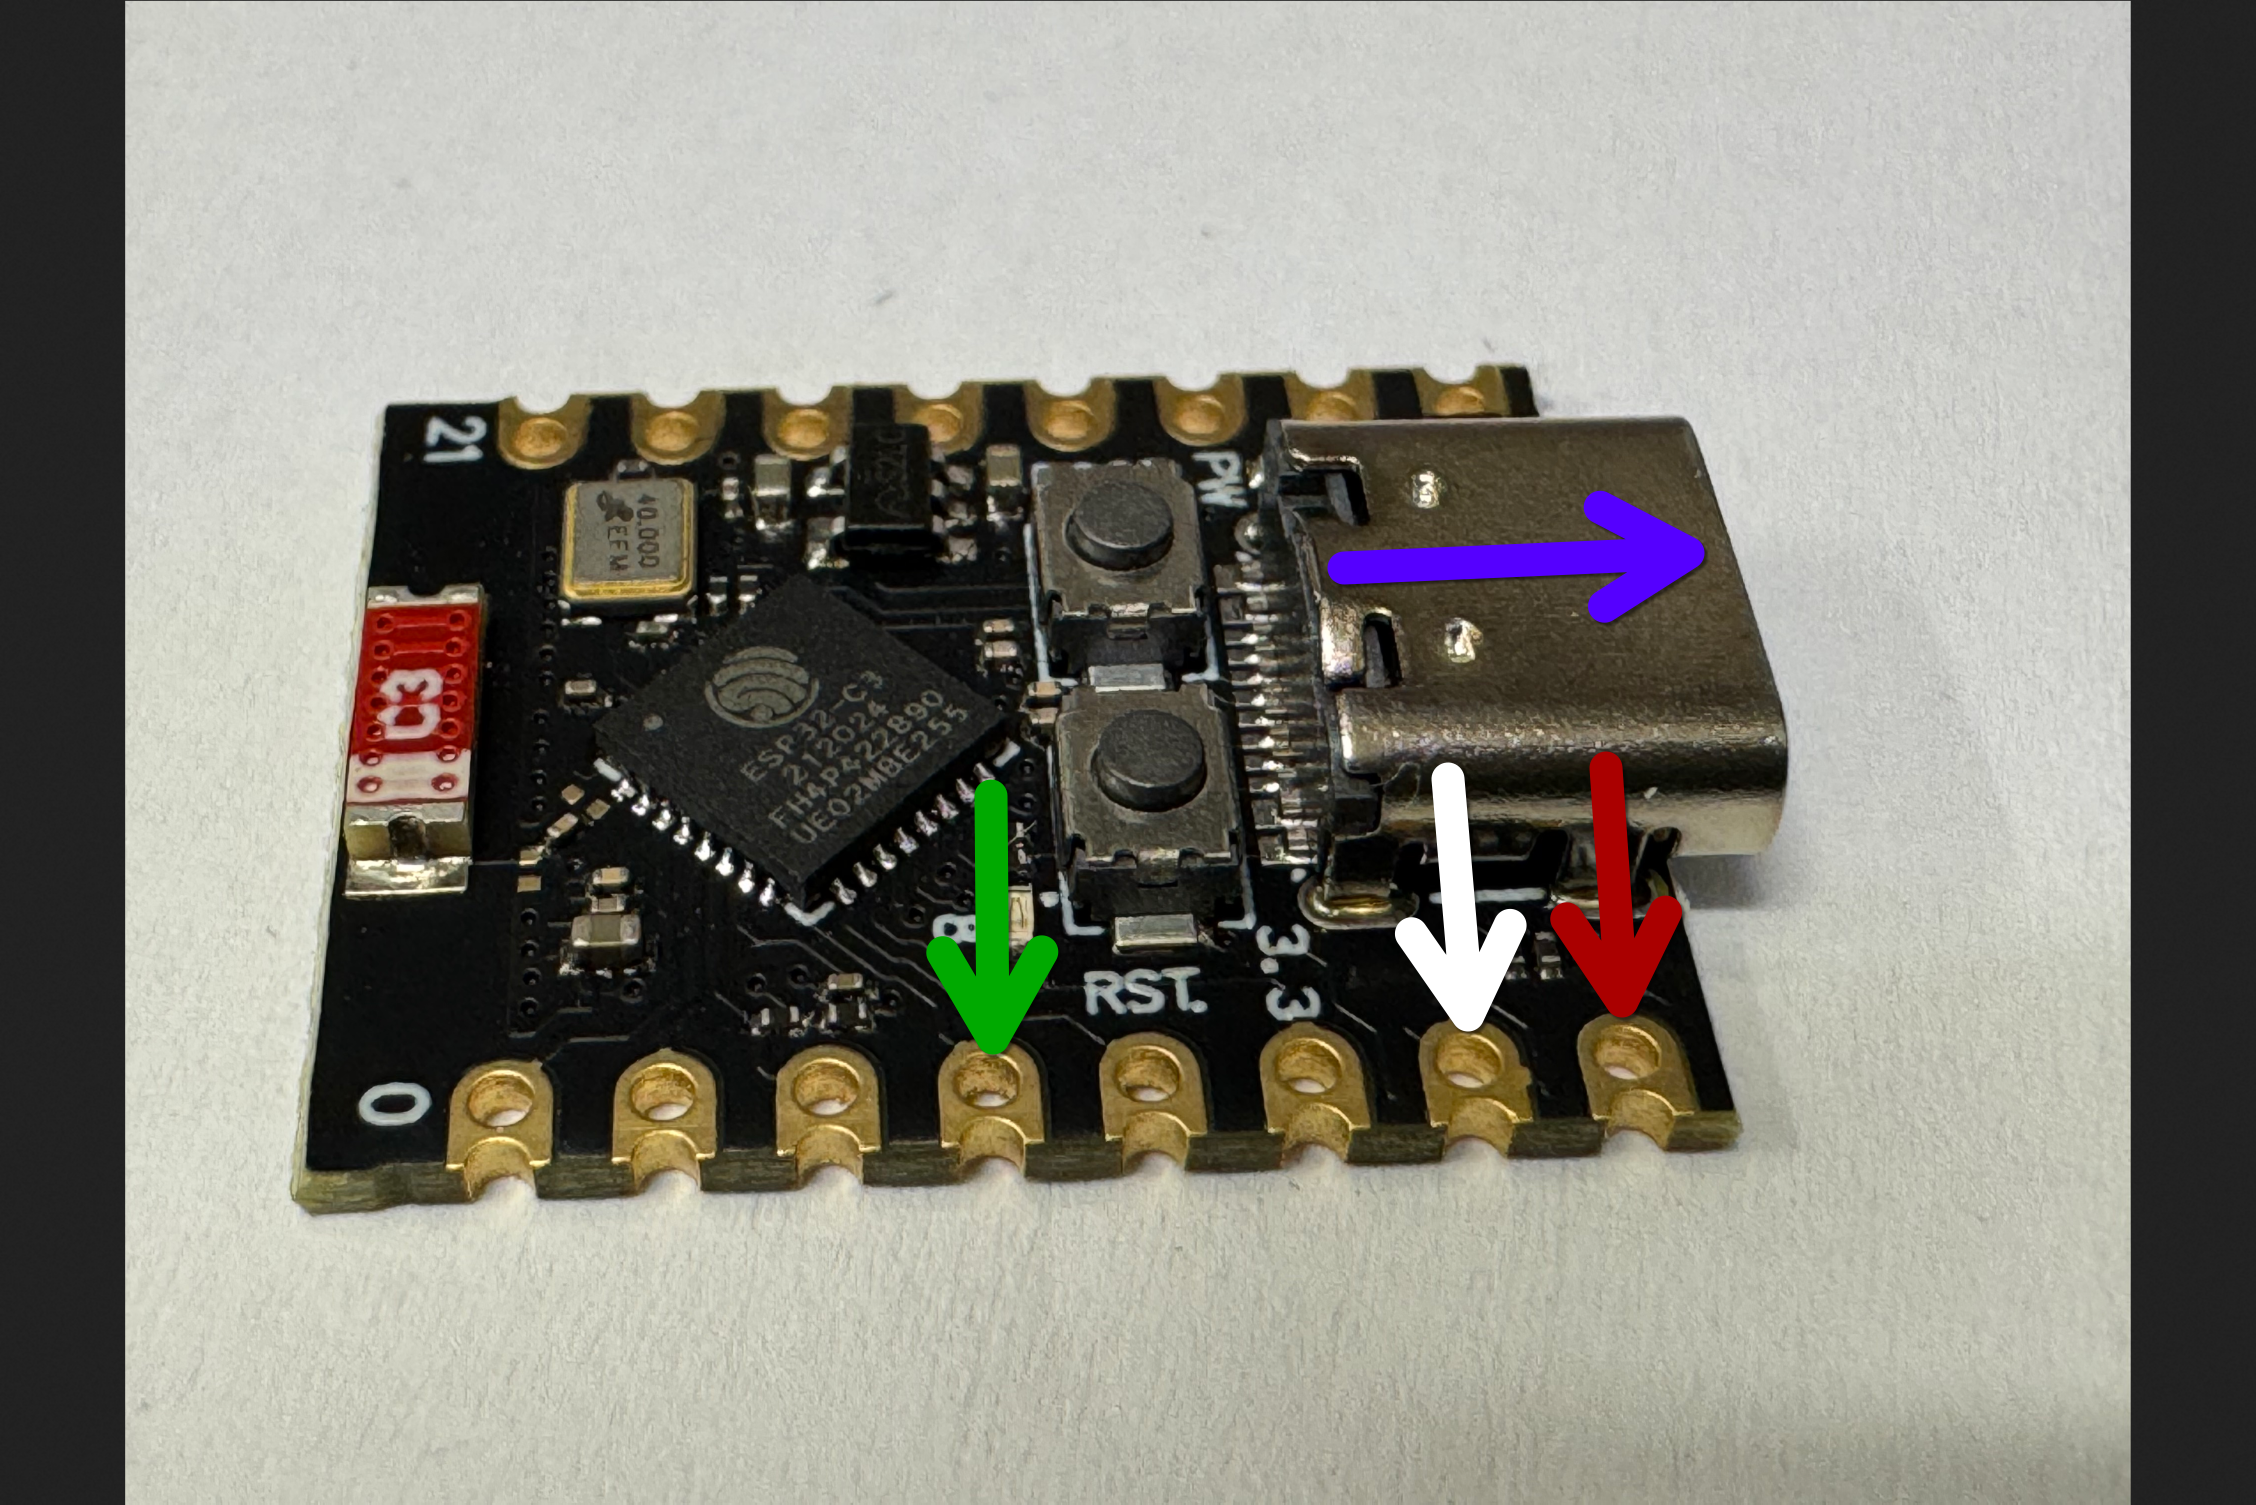
Solder Pluggable Connector to Microcontroller
Now you need to solder the other part of the pluggable connector to your microcontroller.
TODO: Replace picture with actual ESP
Test It!
Test the whole assembly by connecting the microcontroller to USB-C power. The LEDs strip should turn on and glow in a warm orange tone.